Sunday, March 21, 2010

Stained mahogany with Indian rosewood

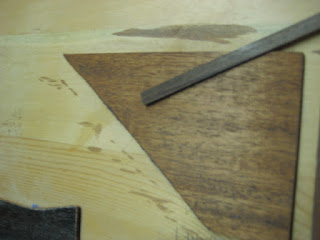
Here's how the binding looks against the stained test pieces. First is the body wood.


And next is the neck wood.


The whole guitar is going to have a pretty dark look, like the old ones look in the pictures. Having rosewood binding on the guitar isn't going to add a lot of contrast and make it look much different than a Martin 00-17 does.

The box is closed

Over the weekend my wife visited her brother and took the digital camera with her. So this, and the following posts, show all the progress I made in the past few days.

I glued the top to the sides, closing up the box. With my new radiused dishes, everything is much more accurate for me, than things were before.


For fun, here's how everything looks, with the parts all layed out.


Oooh...


Aaah...


Can you hear that? Shhh.


She's saying, "quit taking so long, and get this the heck over, so I can go home to Don and be played!"


I need to trim that nut, but I'll do that at the end.


The plan next is to rout the body for binding, set the dovetail neck, finish, glue the bridge on, and setup. We're getting near the end, already. But I've been known to take my time with things.

Don gets his choice between bone and ebony bridge pins. What do you reckon he should choose?

Cloth strips on the sides

I found some cloth ribbon at Walmart that looked quite a bit like the cloth used on early Martins to reinforce the sides and prevent cracks from spreading around the guitar. I cut them to length and drenched one side with super glue. I think it looks pretty cool.

The following two pics were taken through the soundhole.


The brace in the following pic looks huge but only because the camera is so close to it.


Here I put the camera inside the guitar and used the 10 second timer. The camera is down near the end block and is pointing toward the neck block.


I'm pretty proud of how all the bracing turned out, since I made it all myself, out of spruce boards, this time.


Here the camera is underneath the soundhole and pointing towards the end block.


The headstock

Over the weekend, I shaped the back of the headstock. The pre-made Martin neck was pretty close to being finished but there was a rough area near the volute. I got much closer to making it look authentically vintage, than I did on my last guitar.


Here's a mock-up to give an idea of what it might look like with tuners:


A case

I went to Elderly in Lansing on Friday afternoon and picked up this case.


While I was at Elderly I played one of those Santa Cruz "1929" mahogany 00 guitars. I liked it. It has the old vibe, for sure, and will age well. But I think I'm headed in that direction, too. Since becoming a builder I notice a lot more than I used to. Are there any Santa Cruz fans here that would get mad if I mentioned that the back on that one was glued on a tiny bit crooked? Ok, then I won't.

The upper bout

On my first guitar I installed the popsicle brace across the upper bout. The "popsicle brace" is much maligned because it restricts vibration in the upper bout and arguably doesn't do anything to keep the top from cracking in that area anyway. My solution to the problem was to install two smaller braces. I'll also glue the fingerboard extension very lightly to the top. The whole problem is that when a fingerboard is glued firmly to the top, the thin soundboard is no match for the thick fingerboard extension. When the fingerboard inevitably expands or contracts at a different rate than the soundboard, then your top will crack. Not even the popsicle brace will stop it. Anyway, here are the braces I installed...


The pic was taken by laying a mirror inside the guitar and pointing the camera through the soundhole at it. The braces are between the upper transverse brace and the neck block.

Monday, March 15, 2010

A Brazilian rosewood bridge

I've been more and more interested in making my own parts, to work towards doing scratch builds.

I bought some wood recently on ebay that I thought I would use to make a few bridges, and maybe even use one on this guitar.

The wood was advertised as a "quartersawn brazilian rosewood blank." The description said, "
DALBERGIA NIGRA".

After receiving the wood I held onto it for a little while, then cut it up at a friends' place on his bandsaw.

After the wood was cut, it didn't look very much like Brazilian rosewood at all. I my friend immediately said that this was not Brazilian, but it was Pau Ferro.


So I learned my lesson. Don't buy wood from bigmikeyc1on ebay. Store name is "Wooden Artistic Treasures." He either doesn't know what he has or he's deliberately deceptive. I don't think I'm going to buy wood on ebay anymore, from anyone who isn't recommended by someone that I trust, for that matter.

Just get a load of this BS:

I have been dealing with DALBERGIA NIGRA for about fifty years now. My Father made guitars in the New York City area and this came from his estate and was clearly marked. He would never touch Pau Ferro or Santos! This wood has been sitting around since 1987. When I cut into it there was a noticable Rose smell in the work shop maybe due to the large amount of cuttings. I have sold 47 blocks of this on Ebay with only one complaint, yours.

The back is on

I've been concerned about humidity lately. We had a big snow melt and some days of rain in the past week. I took some readings that were in the 50-percent range, and I was worried. So I borrowed this humidifier and let it run for a few days.


It seems to have helped, although not much. I'm not sure. After checking humidity dozens of times with my psychrometer, I think my initial reading may have been high. RH seems to be hovering in the mid-40's now, which is good. I've calibrated this cheap hygrometer, which I don't trust, but that still gives me an idea of when humidity is going up or down.


So, now that I believe I have a good idea of where I'm at humidity-wise, on with the build.

Here's the back being glued on.


The back is on! The boat is done.


I'm trimming the overhang with a chisel. Doing it this way makes cool patterns.


Here's the top sitting on top of "the boat."


It's starting to look more and more like a guitar.


Oooh...


Ahhh...


Ok, now imagine the two pics above with wood this color. Mmmmm...


Here's how the bracing has shaped up. It looks very very nice. I'm considering the bracing "done." If need be, it can be shaped further after the guitar is finished. I guess we'll see. Before gluing the top on, I just need to flatten the top part of the rim above the soundhole, and then I'll glue this on too, within the next few days.


My friends at mimf.com suggested that I slenderize the braces quite abit, so I did. Here, the upper part of the x has been triangle-ized. And I did that to all the major braces. It has a really nice tone...