Monday, May 10, 2010
Nut
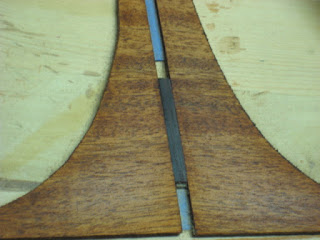
I shaped the sides of the nut and lightly glued it in place with just a small dot of titebond. I got it most of the way there with a belt sander, and then used sandpaper to slowly match the shape to the slot.


Thursday, May 6, 2010
I'm an idiot
I look at the floors in our house every day. I walk on them. They even wind up in a lot of our pictures.

I don't know why it didn't occur to me until today, that I could use the same stuff to stain the guitar with.
Check it out. Minwax red mahogany.


So I learned that transtint dye diluted with alcohol is pretty difficult to spread evenly, both upon bare wood, and over shellac seal coats. And transtint dye diluted with water can make the wood cup (warp) outward, even when applied very lightly, and I don't like that. It's also tough to get the color right with the dyes I used.
The minwax applies evenly, and has a nice transparent look to it. Plus, it's cheap. Amazing.
You can't tell in my earlier pictures, but the dye diluted with water gets the color close, but it leaves a dead, fuzzy, and dull look on the wood. The Minwax looks very light, natural, and iridescent. It isn't fake looking.
I plan to pick up some Minwax dark walnut and see what that looks like. I'll also try a mixture.
I don't know why it didn't occur to me until today, that I could use the same stuff to stain the guitar with.
Check it out. Minwax red mahogany.
So I learned that transtint dye diluted with alcohol is pretty difficult to spread evenly, both upon bare wood, and over shellac seal coats. And transtint dye diluted with water can make the wood cup (warp) outward, even when applied very lightly, and I don't like that. It's also tough to get the color right with the dyes I used.
The minwax applies evenly, and has a nice transparent look to it. Plus, it's cheap. Amazing.
You can't tell in my earlier pictures, but the dye diluted with water gets the color close, but it leaves a dead, fuzzy, and dull look on the wood. The Minwax looks very light, natural, and iridescent. It isn't fake looking.
I plan to pick up some Minwax dark walnut and see what that looks like. I'll also try a mixture.
Tuesday, May 4, 2010
Return of the son of finish color
On my test pieces, I have been sealing them with shellac, then attempting to stain them with dye, diluted with alcohol. I've had mix results. The dye/stain goes on unevenly.
So I tried something different. I poured out my alcohol dye mixtures and prepared a new dye mix, diluting the dye with water instead of alcohol.
I apply the dye first, to bare wood. After I get the dyed wood looking the way I want it, I'll then seal the wood with 1 lb cut shellac.
I think these test pieces look pretty good. I stuck in some rosewood scrap in there to give an idea of what the rosewood binding will look like against the mahogany.


About an hour later, after this "brown mahogany" dye application dries, I lightly sand with 220 grit and then apply another dye application, but a redder version of the same thing. That looks like this:

Ok, now compare that with this.

I've still got more testing to do.
After this dye dries on the wood, it looks a whole lot lighter, so I'll have to apply seal coats and then see what happens. Perhaps I'll add a little dye to the shellac and see what that does.
The last few days, I've also been prepping the bare wood surface of the guitar. Going over it, and removing any scratches and making the surface as smooth as possible. I scraped the soundhole rosette to get it looking as clean as possible. Check out how nice this looks.


It's getting so close to being done, it's painful. But the finish will take a while to cure and properly harden. It'll still be quite a while before I'm able to string it up.
So I tried something different. I poured out my alcohol dye mixtures and prepared a new dye mix, diluting the dye with water instead of alcohol.
I apply the dye first, to bare wood. After I get the dyed wood looking the way I want it, I'll then seal the wood with 1 lb cut shellac.
I think these test pieces look pretty good. I stuck in some rosewood scrap in there to give an idea of what the rosewood binding will look like against the mahogany.
About an hour later, after this "brown mahogany" dye application dries, I lightly sand with 220 grit and then apply another dye application, but a redder version of the same thing. That looks like this:
Ok, now compare that with this.
I've still got more testing to do.
After this dye dries on the wood, it looks a whole lot lighter, so I'll have to apply seal coats and then see what happens. Perhaps I'll add a little dye to the shellac and see what that does.
The last few days, I've also been prepping the bare wood surface of the guitar. Going over it, and removing any scratches and making the surface as smooth as possible. I scraped the soundhole rosette to get it looking as clean as possible. Check out how nice this looks.
It's getting so close to being done, it's painful. But the finish will take a while to cure and properly harden. It'll still be quite a while before I'm able to string it up.
Sunday, May 2, 2010
More finish color
A few posts ago I showed a test piece stained with diluted brown mahogany dye. I went and picked up more dye, this time bright red. I added a few drops to a new brown mahogany mixture.

Here's the old brown mahogany piece.

And here's the new piece with a little red added.

Below, old brown-only is on the left. New brown-with-a-little-red is on the right. I'm staining these pieces by first sealing the wood with 1-lb cut shellac. Then I wipe on the diluted dye with a cloth. I dilute the dye with same thing I'm dissolving my shellac flakes with, 190-proof everclear. It's a challenge to get the dye evenly applied. I need to figure this out before I do the actual guitar.
I stained the piece on the left by wiping on a coat of brown mahogany dye. I stained the piece on the right, by first doing an application of brown mahogany dye, then a later application of the same thing, only reddened. This is similar to how I have read that Martin does it.

Hmm, probably pretty hard to tell in these pics, but the new piece really does look more like Martin's mahogany color. Developing...
Here's the old brown mahogany piece.
And here's the new piece with a little red added.
Below, old brown-only is on the left. New brown-with-a-little-red is on the right. I'm staining these pieces by first sealing the wood with 1-lb cut shellac. Then I wipe on the diluted dye with a cloth. I dilute the dye with same thing I'm dissolving my shellac flakes with, 190-proof everclear. It's a challenge to get the dye evenly applied. I need to figure this out before I do the actual guitar.
I stained the piece on the left by wiping on a coat of brown mahogany dye. I stained the piece on the right, by first doing an application of brown mahogany dye, then a later application of the same thing, only reddened. This is similar to how I have read that Martin does it.
Hmm, probably pretty hard to tell in these pics, but the new piece really does look more like Martin's mahogany color. Developing...
Gluing the fingerboard
The last time I glued a fingerboard I used titebond wood glue. This time, I opted for slow setting epoxy. Though I had good results with my titebond-glued neck last year, there seems to be a near-consensus among builders that there is a high risk of neck warpage due to the moisture present in a glue like titebond.

I masked off the neck to collect most of the squeeze-out from the glue. I purchased these circular clamps from an online RV supply website. They're the same thing that stewmac sells, only much cheaper from the RV place.


I was looking at the blue tape under all those clamps, and thinking to myself, that if I got any little blue tape pieces jammed inside of the teeny crevice between the neck and fingerboard, it would suck. So once I cleaned up much of the squeeze out, I removed most of the tape, and then re-applied all of the clamps.

I was kinda proud of how it turned out, so I showed it to Dylan (my 8 year old son) this morning. He pointed at the leftover glue on the neck and said, "wow, that looks really terrible. Oh well, you'll probably still be able to play it. I guess it'll still be useful."


Of course, glue residue sands off easily.


Here's how the neck-to-body fit looks so far. The neck will be glued to the body after the guitar's finish is applied.

In this picture, you can kinda see the slight "fallaway" I engineered into the fingerboard extension, the part of the fingerboard that rests on the body. This will allow for lower string action. Yet another idea I stole from Frank Ford.

I masked off the neck to collect most of the squeeze-out from the glue. I purchased these circular clamps from an online RV supply website. They're the same thing that stewmac sells, only much cheaper from the RV place.
I was looking at the blue tape under all those clamps, and thinking to myself, that if I got any little blue tape pieces jammed inside of the teeny crevice between the neck and fingerboard, it would suck. So once I cleaned up much of the squeeze out, I removed most of the tape, and then re-applied all of the clamps.
I was kinda proud of how it turned out, so I showed it to Dylan (my 8 year old son) this morning. He pointed at the leftover glue on the neck and said, "wow, that looks really terrible. Oh well, you'll probably still be able to play it. I guess it'll still be useful."
Of course, glue residue sands off easily.
Here's how the neck-to-body fit looks so far. The neck will be glued to the body after the guitar's finish is applied.
In this picture, you can kinda see the slight "fallaway" I engineered into the fingerboard extension, the part of the fingerboard that rests on the body. This will allow for lower string action. Yet another idea I stole from Frank Ford.
Subscribe to:
Posts (Atom)