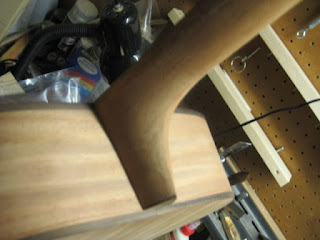
So I've spent the last few evenings chiseling and sanding on the tenon inside the neck heel. First I got the neck angle set up. Then I centered the neck to the body. Then, I lowered the neck down until it was flush with the body. It's a tedious process. Not a lot of dramatic or interesting pictures to show of the process. Just taking the neck out and putting it in, over and over.
Here's the body before I started work on the neck fit.
And here's what the fingerboard extension was looking like as the neck was getting lower.
...and lower...
Until finally, the neck was just about flush with the body.
After I got the neck fit good, I trimmed the end of the heel and installed a heel cap. Did John Hall include a little piece of Brazilian Rosewood for this? I think it is. Looks like it. Had a real sweet smell as I was cutting it. (I'd never cut Brazilian before).
First I trimmed it down with a chisel.
Then I worked on it with sandpaper.
Before I put finish on the body, I thought it would be a good idea to sand the underside of the bridge so that it will fit the top.
Getting closer...
Wednesday, April 28, 2010
Thursday, April 22, 2010
More finish tests
When I visited Wayne Henderson I told him I was planning to use natural colored Behlen's Pore O Pac pore filler, but tint it with dye, and he told me that he uses Pore O Pac, too, but he always uses the pre-tinted kind.
Well, my Pore O Pac filler was unopened so I took it back to Woodcraft and swapped for the mahogany colored stuff.
Now I'm wondering if it's too dark on my new test piece.
Why didn't anybody warn me about how messy this stuff is?
By the way, here's how everything looks now all put together with the binding on.
Monday, April 19, 2010
Binding
I started doing the back binding last night and got the rest of it on today. I used the bike inner tube to strap it down, and titebond to glue the bindings. After removing the inner tube I started scraping the binding flush to the back and sides.
I like the look of thin binding.
After it was looking like the back binding was going to turn out looking really good, I did the same thing to the top.
Here's my gluing method.
Here you can see the left side has been scraped and the right side hasn't been yet.
I think it looks pretty good.
I like the look of thin binding.
After it was looking like the back binding was going to turn out looking really good, I did the same thing to the top.
Here's my gluing method.
Here you can see the left side has been scraped and the right side hasn't been yet.
I think it looks pretty good.
Sunday, April 18, 2010
Routing for binding
Here's the setup I built recently for cutting the binding channels on the edge of the guitar body. I used a scrap piece of countertop for the surface that it all sets on. The cradle is built on the scrap from the mold I built for my 000 guitar, out of plywood. The tower is made from pieces of pine I had laying around. And the angled pieces that hold the laminate trimmer in place, are the offcuts from the radiused dishes I made out of fiberboard.
The trimmer slides up and down on sliding drawer hardware. The whole thing cost a couple of bucks, except for the trimmer.
The base of the trimmer has a disc made of slippery plastic, which rides on the guitar body. If you're looking for one of these, John Hall sells them.
Router bit sets designed specifically for cutting guitar binding channels are kind of pricey. To heck with that. I just bought a flush cut bit and then swapped out a different bearing to give me a 1/16" rabbet bit, for under $20.
I don't like to take any chances. I masked off the top, back and sides before cutting, to reduce chances of tear-out.
The system worked like a charm. I got really good results.
First I did the back.
Here's how it looks after removing all the tape.
Subscribe to:
Posts (Atom)